Growing lilies successfully comes down to three things: knowing exactly which "lily" you have, matching it to the right conditions, and not skipping the drainage step. These tips are a great way to consider how the lilies grow in real garden conditions, not just on a label. Get those right and lilies are surprisingly forgiving. Skip them and you'll be pulling up rotted bulbs wondering what went wrong. This guide walks you through the whole journey, from picking the right variety for your yard through planting, watering, feeding, and keeping things alive year after year.
How Do Lilies Grow Bible Guide: Planting to Blooms

Marcus Hendricks
25 Apr 2026
First, figure out which "lily" you actually have

This is the step most people skip and then wonder why their advice isn't working. The word "lily" gets slapped onto dozens of plants that are completely unrelated to each other. Before you do anything else, figure out which one you're dealing with. Before you do anything else, figure out which one you're dealing with are Lily of the Valley hard to grow.
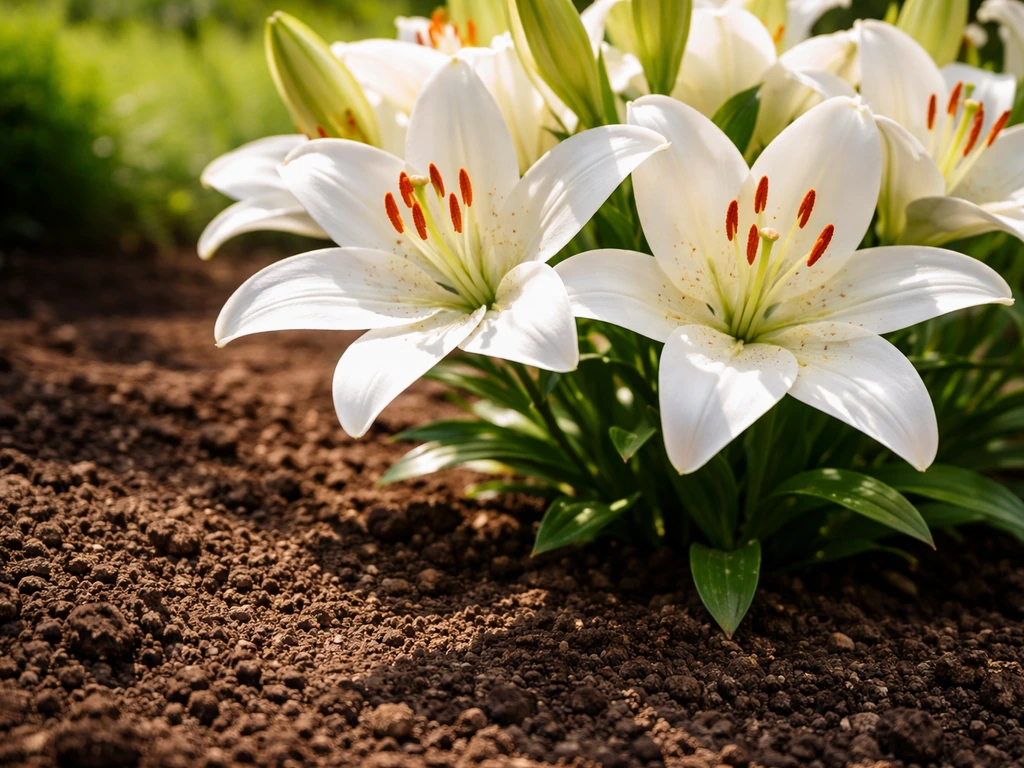
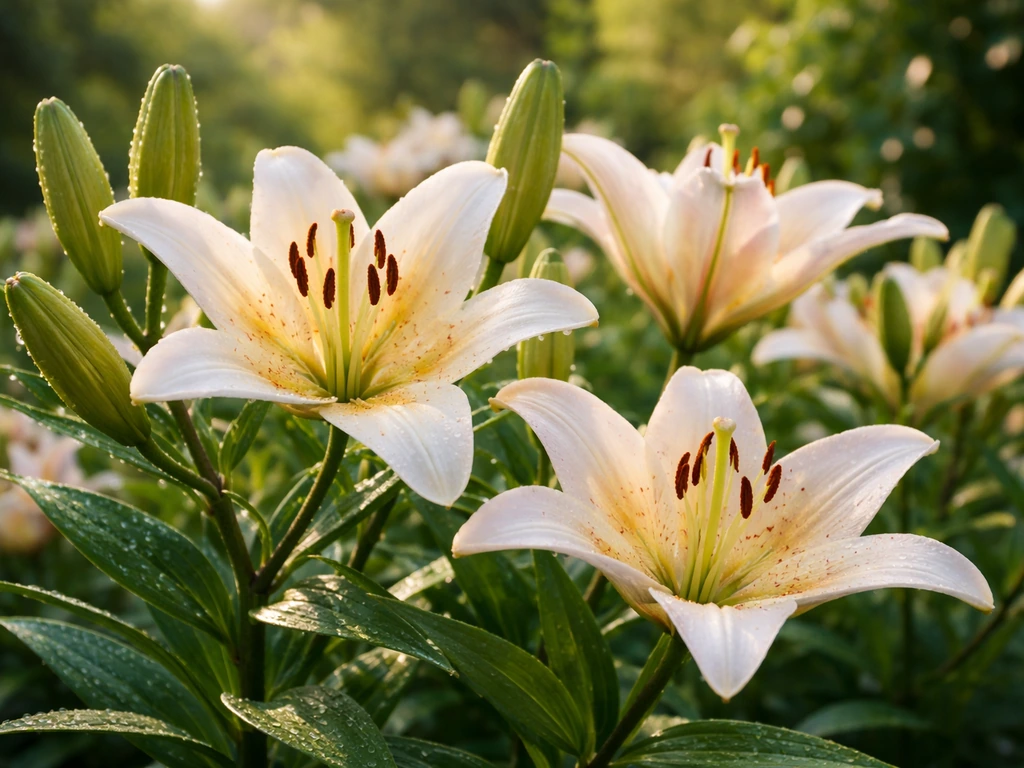
True lilies belong to the genus Lilium and grow from scaly bulbs. Asiatic and Oriental lilies are the most common types you'll find at a garden center. They're what most people picture when they think of a classic lily: tall stems, dramatic flowers, and a bulb you plant in the ground. These are the main focus of this guide.
But here's where it gets confusing. Peace lilies (Spathiphyllum) are not true lilies at all. They're tropical houseplants with no bulb, and they need completely different care. Calla lilies (Zantedeschia) grow from rhizomes, not scaly bulbs. Daylilies (Hemerocallis) grow from rooted fans, each flower lasts only one day, and they're tough-as-nails perennials with almost no overlap in care with true lilies. Water lilies (Nymphaea) are aquatic plants that live in ponds. Each of these plants has its own growing rules, so mixing up the advice is a fast way to kill something.
| Common Name | Genus | Growth Form | Where It Grows |
|---|---|---|---|
| True lily (Asiatic, Oriental) | Lilium | Scaly bulb | Garden beds, containers, USDA Zones 3-9 |
| Peace lily | Spathiphyllum | Tropical rhizome | Indoors, no frost tolerance |
| Calla lily | Zantedeschia | Rhizome | Garden or containers, tender in cold zones |
| Daylily | Hemerocallis | Rooted fan/crown | Garden beds, extremely cold-hardy |
| Water lily | Nymphaea / Nuphar | Aquatic rhizome | Ponds and water features |
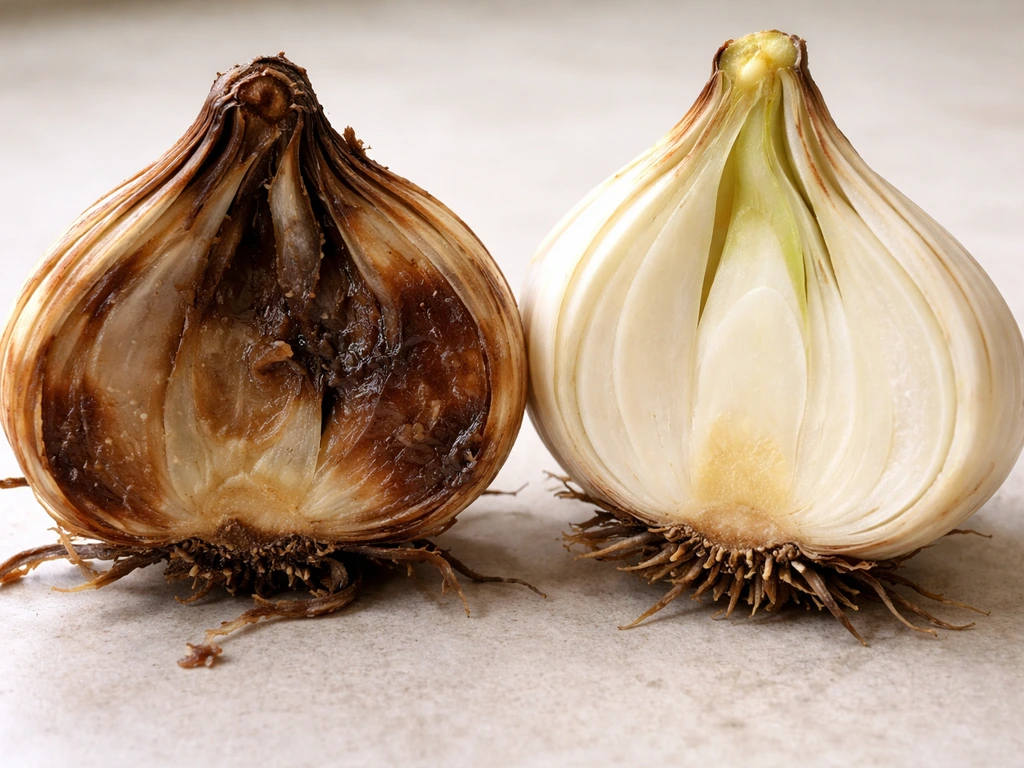
If you're not sure what you have, look at the root or bulb structure when you buy it. A true lily bulb looks like a small artichoke, with overlapping scales and no papery outer skin. A daylily will have fleshy roots attached to a crown. A peace lily will have no bulb at all. That single check will save you a lot of frustration.
Where lilies grow best: climate, hardiness, and site
Most Asiatic and Oriental hybrid lilies are hardy in USDA Zones 4a through 8b, with some varieties stretching from Zone 3 to Zone 9. In European terms, that covers most of the UK and continental Europe except the coldest alpine areas and the hottest Mediterranean summers. The sweet spot for lilies is a climate with cool winters, moderate summer temperatures, and good seasonal swings. They want to go dormant in winter, not stay active year-round.
The single most important site decision is drainage. Lily bulbs sitting in waterlogged soil will rot from fungal diseases like Pythium, Rhizoctonia, and Fusarium before you even see a shoot. Drainage matters more than minor temperature differences. If your yard has heavy clay, either raise the bed by at least 8 to 12 inches or plant in containers. Don't plant lilies in a low spot that holds water after rain.
Beyond drainage, look for good air circulation. Humid, stagnant air promotes botrytis blight, a gray mold that can devastate lily foliage. Don't crowd lilies against walls or fences where air doesn't move. An open spot with some space between plants is ideal, especially if you're in a hot, humid climate like the southeastern US.
If you're in a very hot climate (Zone 9 or higher), afternoon shade can help prevent heat stress, but morning sun is still important. In cooler zones, full sun all day is ideal. The general rule is a minimum of 6 hours of direct sunlight, with 6 to 8 hours being the target for the best bloom production.
Light and soil requirements
Sunlight
Lilies are sun-lovers. Six to eight hours of direct light daily is the baseline. Less than that and you'll get weak, floppy stems and fewer flowers. I've tried pushing Asiatic lilies into a partially shaded bed and got exactly three blooms on plants that should have had a dozen. Full sun matters. If you're planting near trees or buildings, track the shadow patterns before you dig.
Soil type, pH, and structure
Lilies want slightly acidic soil with a pH of about 5.5 to 6.5, with 6.0 being the sweet spot for hybrids. If your soil is very alkaline, a light application of sulfur can bring it down. The texture should be loose and crumbly enough that water drains through within a few hours of heavy rain. Sandy loam with some organic matter is ideal. If you have heavy clay, work in compost, perlite, or coarse grit to open it up before planting.
Don't add too much nitrogen-rich material like fresh manure at planting time. It pushes leafy growth at the expense of flowers and can increase disease pressure. A well-balanced organic amendment like finished compost is all you need at the planting stage.
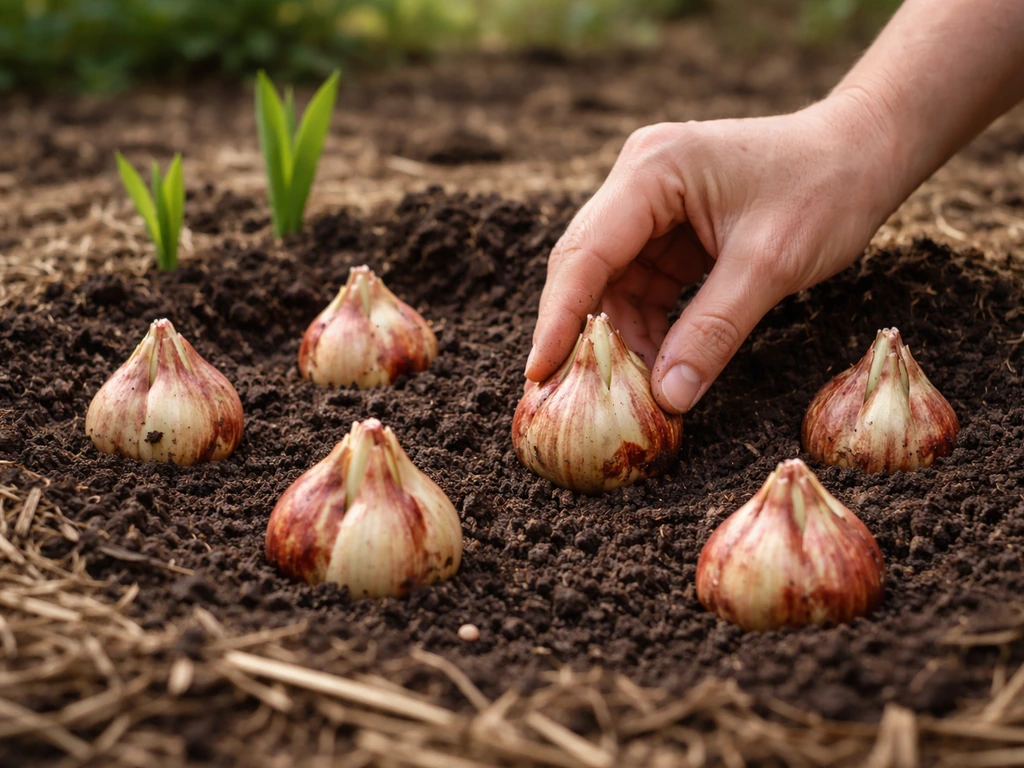
How to plant lilies correctly
When to plant
Plant lily bulbs in fall for most varieties, ideally 4 to 6 weeks before the ground freezes. This gives roots time to establish before winter. In USDA Zones 3 and 4, that usually means September to October. In Zones 7 and 8, you can plant as late as November or even December. Spring planting works too if you buy bulbs late, but fall-planted bulbs generally perform better in their first season. Asiatic lilies are less fussy about timing than Oriental varieties, which prefer the cooler soil temperatures of fall planting.
Depth and spacing
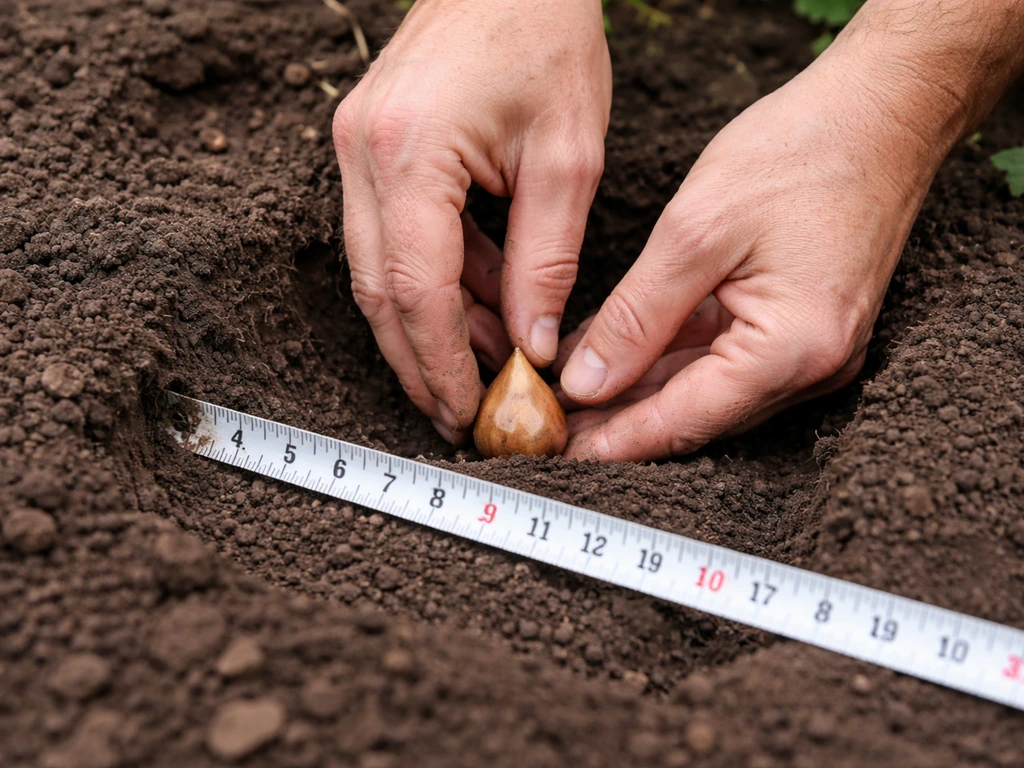
The standard depth rule is to blank" rel="noopener noreferrer">plant bulbs at a depth equal to about three times the bulb's height. A large bulb (about 2 to 3 inches tall) goes in roughly blank" rel="noopener noreferrer">6 to 8 inches deep. A smaller bulb goes in about 4 to 5 inches deep. The 6-inch depth is a good default if you're not sure, and it provides adequate winter protection in most hardy zones. One exception: Lilium candidum (Madonna lily) is planted differently, with the nose of the bulb barely covered, just an inch or two below the surface.
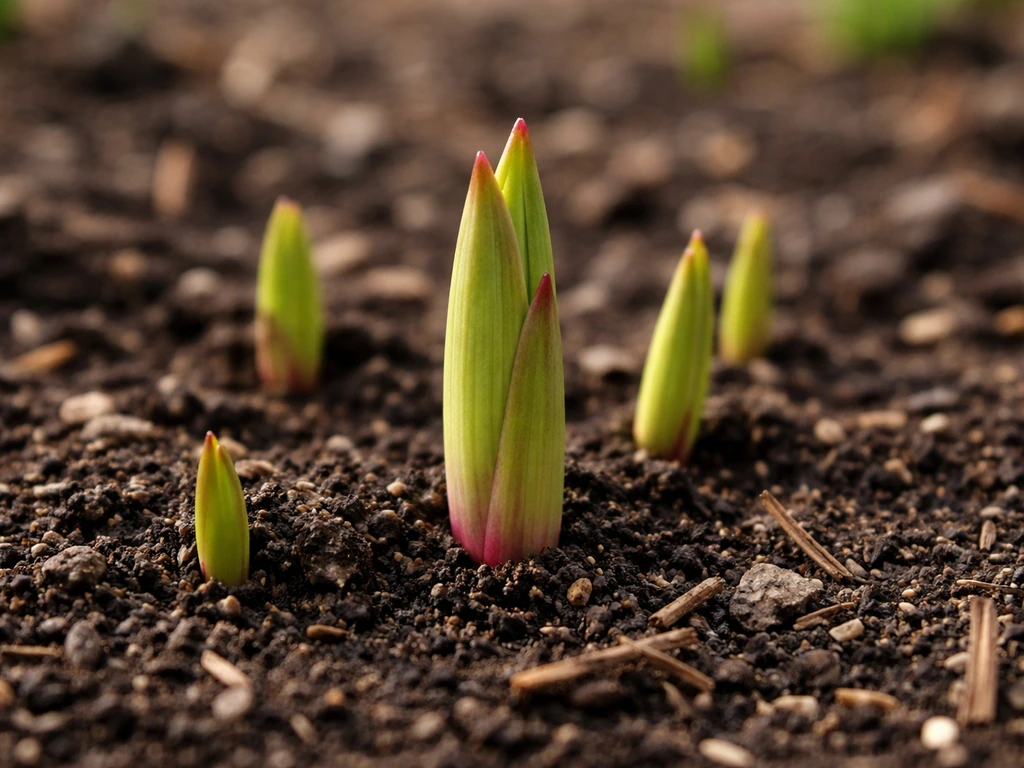
Space bulbs 8 to 12 inches apart for smaller varieties and 12 to 18 inches apart for tall Oriental lilies. Closer spacing looks full but cuts airflow, which increases disease risk. Mark your bulb locations with a stake or label after planting. Lily shoots emerge in spring and are extremely brittle. Accidentally driving a trowel through them while planting something else nearby is one of the most common and annoying mistakes, and I speak from experience.
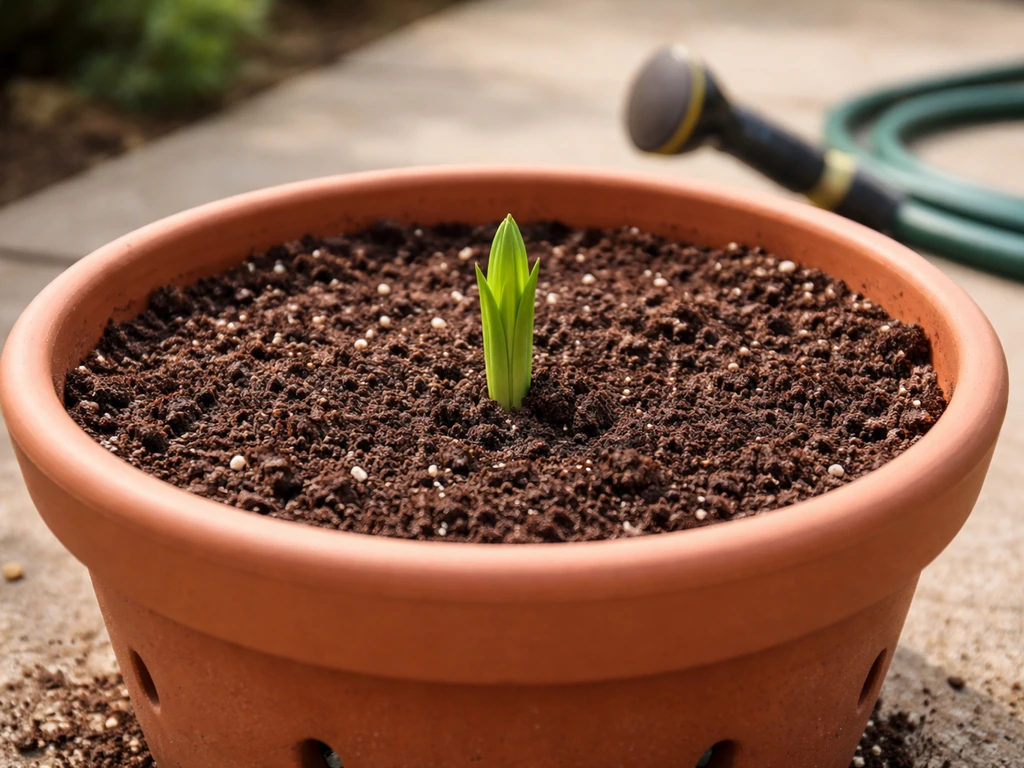
Growing lilies in containers
Containers work well for lilies, especially if your garden soil has drainage problems. Use a pot at least 12 inches deep with drainage holes at the bottom. A good potting mix with added perlite (about 20 to 30 percent by volume) keeps drainage sharp. Plant the bulbs at the same depth as you would in the ground. Water well after planting to eliminate air pockets around the bulb. Keep the pot outdoors through the growing season and water when the top inch of soil feels dry. After stems yellow and die back in late summer, reduce watering and let the bulb go dormant before the frost. In cold zones, move containers to an unheated garage or shed for winter.
Water lilies: a completely different planting approach
Water lilies are planted in aquatic pots or mesh baskets filled with heavy loam or a dedicated aquatic planting mix, not in regular potting soil, which floats. Place the rhizome in the basket at an angle with the growing tip pointing upward and just barely exposed. Lower the basket into the pond gradually, starting in shallower water (about 6 to 8 inches above the crown) and moving it deeper (12 to 18 inches for most hardy varieties) once the plant is established, usually after two to three months. Fertilize with aquatic plant fertilizer tablets pushed into the soil in the basket. Their care is entirely separate from garden lilies.
Watering and fertilizing: a practical schedule
Watering garden lilies
Lilies need consistently moist but never soggy soil during the growing season. A good target is about 1 inch of water per week from rain or irrigation. Water at the base of the plant, not overhead. Overhead watering keeps foliage wet and dramatically increases the risk of botrytis. Use drip irrigation or a soaker hose if you can. During dry spells, check the top 2 inches of soil. If it's dry, water deeply. If it still feels moist, wait. After the stems die back in fall, stop watering and let the soil dry slightly around dormant bulbs.
Fertilizing garden lilies
Start fertilizing in spring when you see the first shoots emerge. A balanced fertilizer like 10-10-10 or a bulb-specific formula like 5-10-5 applied around the base of the plants works well. The higher phosphorus in a 5-10-5 supports strong root development and flower production. Apply again when buds form. Avoid heavy nitrogen fertilizers mid-season because they push leaves at the expense of flowers. If your soil is fairly lean, you can also work bone meal or a bulb booster into the top inch of soil at planting time as a slow-release foundation.
Fertilizing water lilies
Water lilies are heavy feeders during the growing season. Push aquatic fertilizer tablets into the soil of the planting basket every three to four weeks from late spring through early August. Don't use regular garden fertilizer in your pond. It will dissolve into the water and feed algae instead of the plant. Most water lily problems with poor blooming come down to either too little fertilizer or insufficient sunlight, since water lilies also need a minimum of 6 hours of direct sun per day.
Seasonal care and overwintering
During the growing season
Tall Oriental and Asiatic lilies often need staking, especially in windy spots. Stake when plants are about 12 inches tall, before they need it, rather than after they've toppled. Use a single bamboo cane per stem and tie loosely with soft garden twine. Deadhead spent flowers by snipping the bloom just below the flower head, but leave the stem and leaves in place until they yellow naturally. The leaves are feeding the bulb for next year's bloom. Removing the stem too early is a common reason lilies underperform in their second season.
Fall and winter preparation
After the first frost kills back the foliage, cut stems down to about 2 to 3 inches above the ground. Apply a 3 to 4 inch layer of mulch over the planting area, straw, shredded leaves, or wood chips all work well. This insulates the bulbs against freeze-thaw cycles that can heave them out of the ground or cause rot. In Zones 3 and 4, a heavier mulch layer of 4 to 6 inches is worth it for extra protection.
In Zone 3 or colder, or if you're growing tender varieties that aren't rated for your zone, you'll need to lift and store the bulbs. After the foliage dies back, dig the bulbs carefully, shake off excess soil, and let them air-dry for a day or two in a shaded, ventilated spot. Then pack them in a breathable medium like peat moss, coarse sand, or vermiculite and store in a cool (35 to 45 degrees F), dark place like an unheated basement or garage until spring.
Water lily winter care
Hardy water lilies (Nymphaea varieties rated for your zone) can stay in the pond over winter if the water won't freeze solid. Move the basket to the deepest part of the pond before cold weather arrives. Tropical water lilies must be brought indoors before the first frost. Remove old and dying leaves regularly throughout the season, since removing spent flowers also redirects energy toward new bloom production.
Troubleshooting: when things go wrong
No flowers or very few blooms
The most common cause is not enough sun. Six hours is the minimum; if your plant is getting four, it will grow leaves but struggle to bloom. The second most common cause is cutting the foliage back too early the previous season, which starved the bulb of energy reserves. Overcrowding, poor soil nutrition, and bulbs planted too shallow can also reduce flowering. Check all four before blaming the variety.
Yellow leaves
Yellowing that starts from the bottom of the plant and moves upward during the growing season is often normal senescence as the plant approaches dormancy. Yellowing earlier in the season, especially with spotting or a bleached look, can point to aphid feeding, nitrogen deficiency, or waterlogged soil. Check under the leaves for aphids (small soft-bodied insects in clusters). If the soil has been wet for extended periods, root rot is likely.
Rotting bulbs
Rotted bulbs almost always trace back to poor drainage. Pythium, Rhizoctonia, and Fusarium are all soil-borne fungi that attack lily bulbs in wet conditions. There's no saving a bulb that has already rotted. The fix is to improve drainage before you replant, either by raising the bed, amending the soil with grit and compost, or moving to containers. Don't replant lilies in the same spot where rot occurred without addressing the underlying drainage problem.
Botrytis blight (gray mold)
Botrytis shows up as brown spots on leaves and stems, often with a grayish fuzzy coating in humid conditions. It's worse after frost damage, hail, or in densely planted beds with poor air movement. Remove affected plant material immediately and dispose of it in the trash, not the compost. Improve spacing and airflow. In high-humidity climates, a preventive fungicide spray during wet periods can reduce pressure. This disease gets worse fast, so act when you first notice symptoms.
Lily leaf beetle and other pests
The lily leaf beetle is a bright red beetle introduced from Eurasia that has become a serious pest in parts of North America. It eats leaves, stems, and buds, and its larvae are particularly destructive. Hand-pick adults and larvae daily if populations are low. For heavier infestations, neem oil or spinosad are effective organic options. Aphids are the other main insect pest, affecting both garden lilies and water lilies. A strong spray of water knocks them off most plants, or use insecticidal soap for persistent colonies. Always identify the pest before treating so you're not wasting effort or harming beneficial insects.
Your next steps based on where you are right now
Here's how to use this guide based on your current situation. April is a great time to be thinking about this because you're right at the edge of the best planting window in many zones.
- Identify your lily type using the table above. If you have a peace lily or daylily, the care path is completely different from what's described here for true bulb lilies.
- Check your USDA or RHS hardiness zone. Asiatic lilies are your most reliable choice in Zones 4 to 7. Oriental lilies need a little more warmth and do best in Zones 5 to 8.
- Assess your site: does it get 6 or more hours of direct sun? Does water drain away within a few hours of rain? If the answer to either is no, plan to amend the soil or choose containers before spending money on bulbs.
- If you're planting in spring (now), buy bulbs as soon as possible and plant immediately. Spring-planted bulbs need time to establish before summer heat. Water well after planting to settle the soil.
- Test your soil pH if you haven't in the past two years. A simple home test kit is fine. Aim for 5.5 to 6.5. Adjust with sulfur (to lower) or garden lime (to raise) before planting.
- Set a reminder to fertilize when shoots emerge and again when buds form. Mark your bulb locations now so you don't accidentally damage brittle spring shoots.
- Plan your pest monitoring routine. Check plants weekly once growth starts, especially undersides of leaves for lily beetle eggs and aphid colonies.
- Decide now whether your bulbs will need lifting for winter based on your zone. If you're in Zone 4 or colder, have your storage medium (peat, vermiculite) and containers ready for fall.
The related questions of where lilies grow, when they grow, and how conditions differ by variety are all worth understanding together. Once you know your climate zone, your light situation, and your drainage conditions, most of the guesswork disappears and growing lilies becomes genuinely enjoyable rather than a cycle of hopeful planting and disappointing results.
FAQ
Can I grow lilies from supermarket bulbs, or do I need bulbs meant for planting?
Supermarket bulbs are often sold as “flower bulbs” or as cut-season stock and may not be viable for planting, or they may be treated to prevent sprouting. If you want to try them, check that the bulb feels firm and has intact, scaly layers (no mushy spots, mold, or papery dryness), then plant immediately at the correct depth and keep the soil evenly moist but well-drained until shoots appear.
What’s the fastest way to tell which lily problem I’m dealing with, rot, disease, or pests?
Do a quick three-check: (1) If bulbs were in wet soil or the bed stays soggy after rain, assume rot risk first. (2) If you see brown leaf spots, especially in humid weather, look for botrytis patterns and remove affected tissue right away. (3) If you see clusters on new growth, inspect under leaves for aphids, while missing or chewed buds points more toward beetles or caterpillars.
Why are my lily shoots coming up but then they stall or fail to flower?
Most stalls come from one of four issues: too little direct sun (often under about 6 hours), bulbs planted too shallow, low phosphorus support during bud development, or foliage cut too early the prior season. Check the planting depth and sunlight first, then review whether last year’s stems were left until they naturally yellowed.
How do I water lilies when it rains often, so they stay moist but not soggy?
If your site drains well, you can follow the usual “about 1 inch per week” target. In rainy periods, don’t add irrigation automatically, instead test the top 2 inches of soil before watering. If it stays wet for more than a couple of days, reduce watering and prioritize drainage improvements, because lily rot starts in persistently waterlogged conditions.
Is it okay to mulch lilies, and how thick should it be without causing rot?
Mulch is helpful for insulation, but keep it off the crown so moisture does not sit right at the bulb. A typical layer of about 3 to 4 inches works well in most zones, and thicker layers (around 4 to 6 inches) are mainly for very cold areas. Avoid deep, compact mulches that stay wet all season, especially in clay soils.
Can I grow lilies in shade under trees or next to a fence?
They can survive in partial shade, but expect reduced blooms and taller, weaker stems if the light is below the minimum. Next to fences or walls can also reduce airflow, increasing botrytis risk. If you do plant in that spot, give them morning sun, leave extra space between plants, and monitor leaves closely after humid weather.
What’s the difference between deadheading and cutting the whole stem back, and why does it matter?
Deadhead the spent flower by removing just the flower head portion while leaving leaves and the main stem in place. Cutting the stem too early removes the foliage that feeds the bulb, which often leads to poor or missing flowering the next season.
How do I overwinter lilies in very cold winters without losing bulbs to freeze-thaw cycles?
In zones that can drop very low or where soil heaves, use a deeper mulch layer and keep drainage excellent. If the variety is not hardy for your zone, lift after foliage dies back, air-dry briefly in a ventilated shaded place, then store in a cool dark location in breathable media until spring. Don’t store in sealed plastic, which can trap moisture.
Should I fertilize lilies right after planting, or wait until shoots emerge?
In most cases, wait until you see first shoots in spring. At planting time, a slow-release foundation like finished compost or a light slow-release bulb amendment is usually enough. Overdoing nitrogen early can shift growth toward leaves at the expense of flowers and increase disease pressure later.
Why do my lilies fail to return in the second year even though they looked healthy the first season?
The most common cause is premature stem removal, which starves the bulb of energy reserves. Other causes include shallow planting, persistent under-sun, and poor nutrition during bud formation. Also confirm the soil drainage improved if you ever had waterlogged conditions, since hidden bulb damage may show up after the first bloom cycle.
How can I prevent lily leaf beetles without harming beneficial insects?
Start with daily checks when populations are low, hand-picking adults and larvae. If you need a treatment, use targeted options like neem or spinosad and apply only when beetles are present, early in the day, and away from peak beneficial insect activity. Always identify the pest first, because aphids require a different approach.
Next Articles
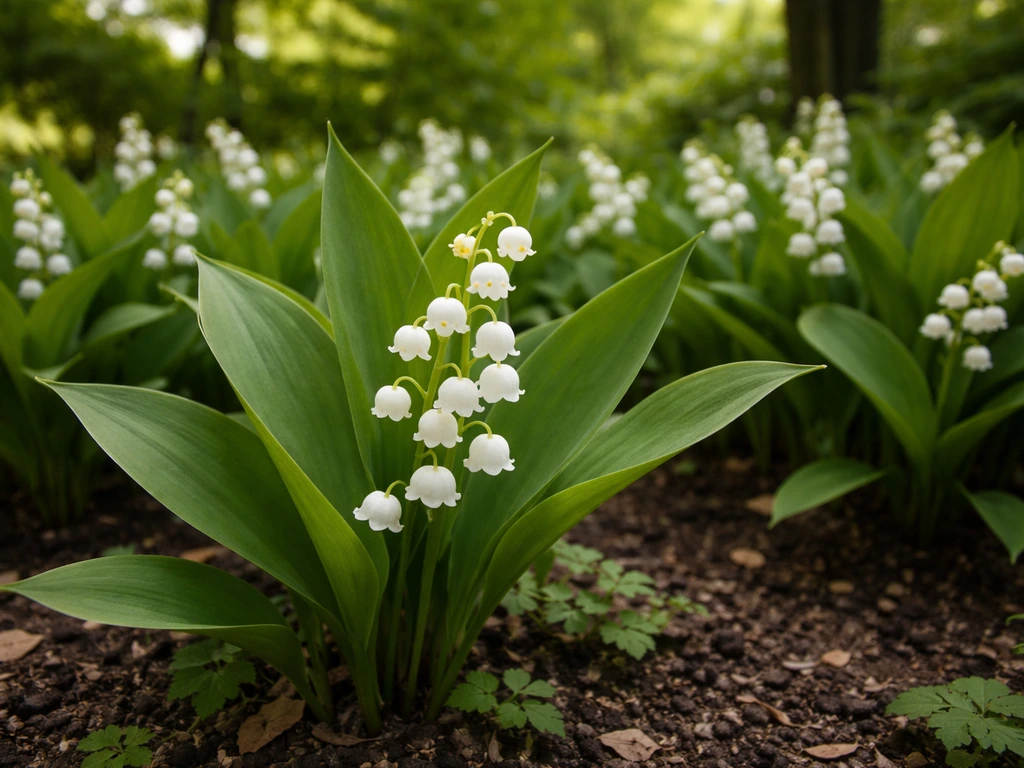
Are Lily of the Valley Hard to Grow? How to Succeed
Learn if lily of the valley is hard to grow and the exact light, soil, watering, planting, and timing to succeed.
Consider the Lilies How They Grow: Meaning and How to Grow
Understand consider the lilies how they grow, then get practical care for true lilies, peace, calla and water types.
When Do Lilies Grow? Signs, Timing, and Grow-Back Tips
Know when lilies sprout and regrow, what to look for, typical timelines, and how to boost delayed growth.