What we are specifically talking about in this article is growing calla lilies in a water-only or nearly water-only environment indoors or in a container, with no soil. Think vase-style setups, wide glass containers with pebbles, or basic hydroponic trays. This is different from growing them in a pond, though the same root principles apply. If you want to know about whether calla lilies can grow in ponds specifically, that is worth its own read. Here we are focused on the practical, day-one setup for a water-grown calla at home.
What part of the calla goes in water (bulb, corm, or rhizome)

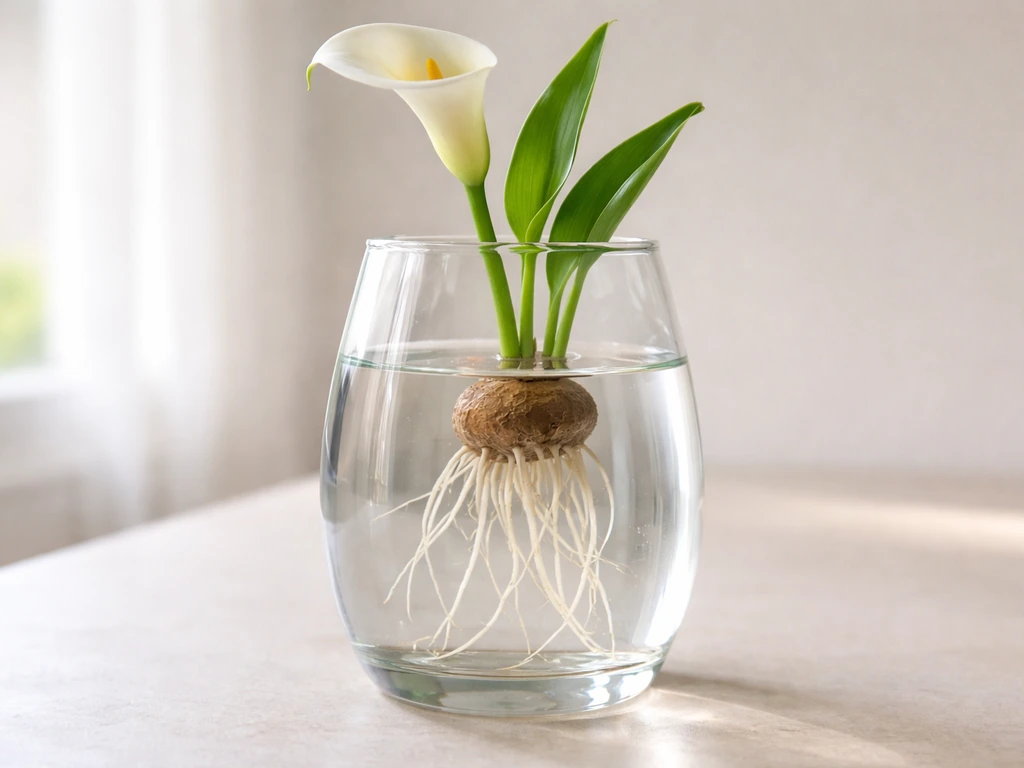
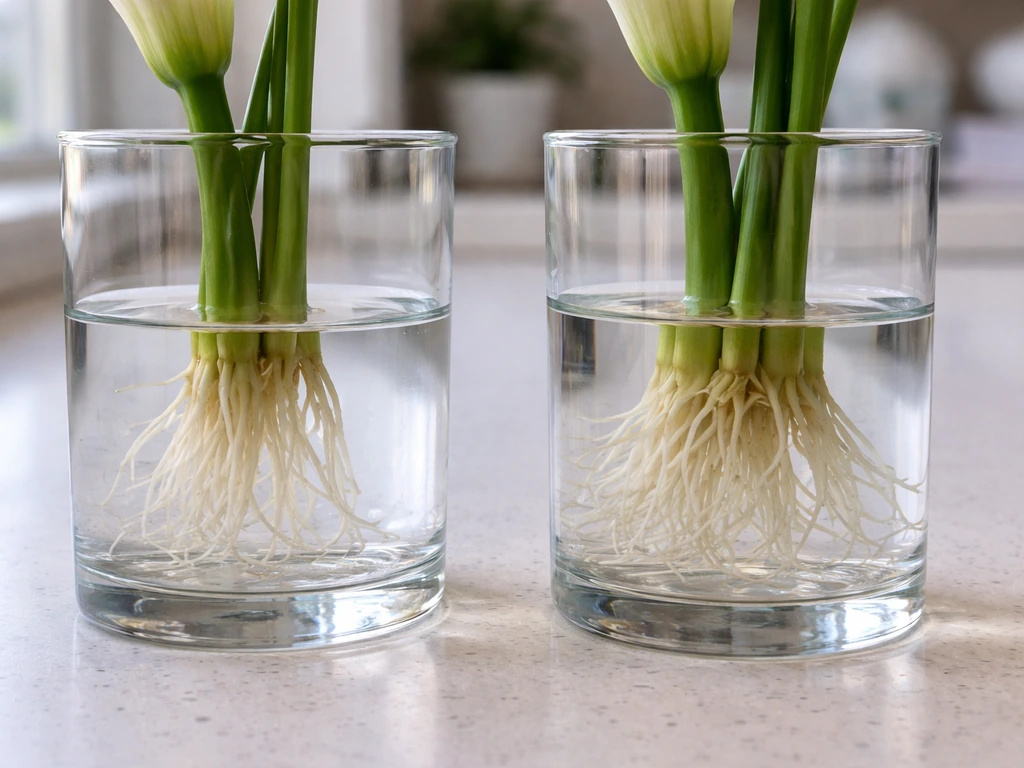
Calla lilies grow from a corm, which most people call a bulb even though technically it is not. It is a thick, starchy storage organ with a flat or slightly concave top side (where the growing point, or "eye," sits) and a rougher, rounder bottom. Getting this orientation right is critical when setting up a water system, because the top of the corm must stay above the waterline. The roots will emerge from the bottom and sides and they are happy to sit in water. The top crown of the corm absolutely cannot be submerged or kept constantly wet, because that is exactly the part that rots first.
The RHS specifically warns that rhizomes may rot if overwatered, and from personal experience this is the number one way people kill callas in water setups. They see "water plant" and submerge the whole corm. Do not do this. Think of it like an iceberg: roots below the surface, crown above it.
How to set up a water vase or hydroponic-style system
The setup is simpler than it sounds. Here is what works well in practice, whether you are using a wide glass vase, a ceramic bowl, or a dedicated hydroponic container.
- Choose a container that is at least 6 to 8 inches wide and 6 inches deep. Wider is better because it gives roots room to spread and allows some air circulation at the water surface.
- Layer 2 to 3 inches of rinsed pebbles, coarse gravel, or clay hydroponic balls (LECA) at the bottom. This is what holds the corm stable and keeps its crown above water.
- Set the corm on top of the pebbles with the flat, indented (growing) side facing up. The bottom and sides of the corm should rest in or just above the pebble layer.
- Add water until it reaches just below the base of the corm. The roots, once they emerge, will grow down into the water. The corm itself should not be sitting in the water.
- If you want to give the plant a nutritional boost, add a diluted, balanced liquid fertilizer at about one-quarter the recommended strength. Avoid high-nitrogen formulas, because excess nitrogen encourages soft, sappy growth that is far more vulnerable to bacterial rot.
- Change the water every 7 to 10 days. Stagnant, oxygen-depleted water is the enemy here. Fresh water keeps oxygen levels up and prevents the bacterial buildup that causes rot and foul odor.
- Place the container in a spot with bright, indirect light and keep it away from cold drafts or heating vents.
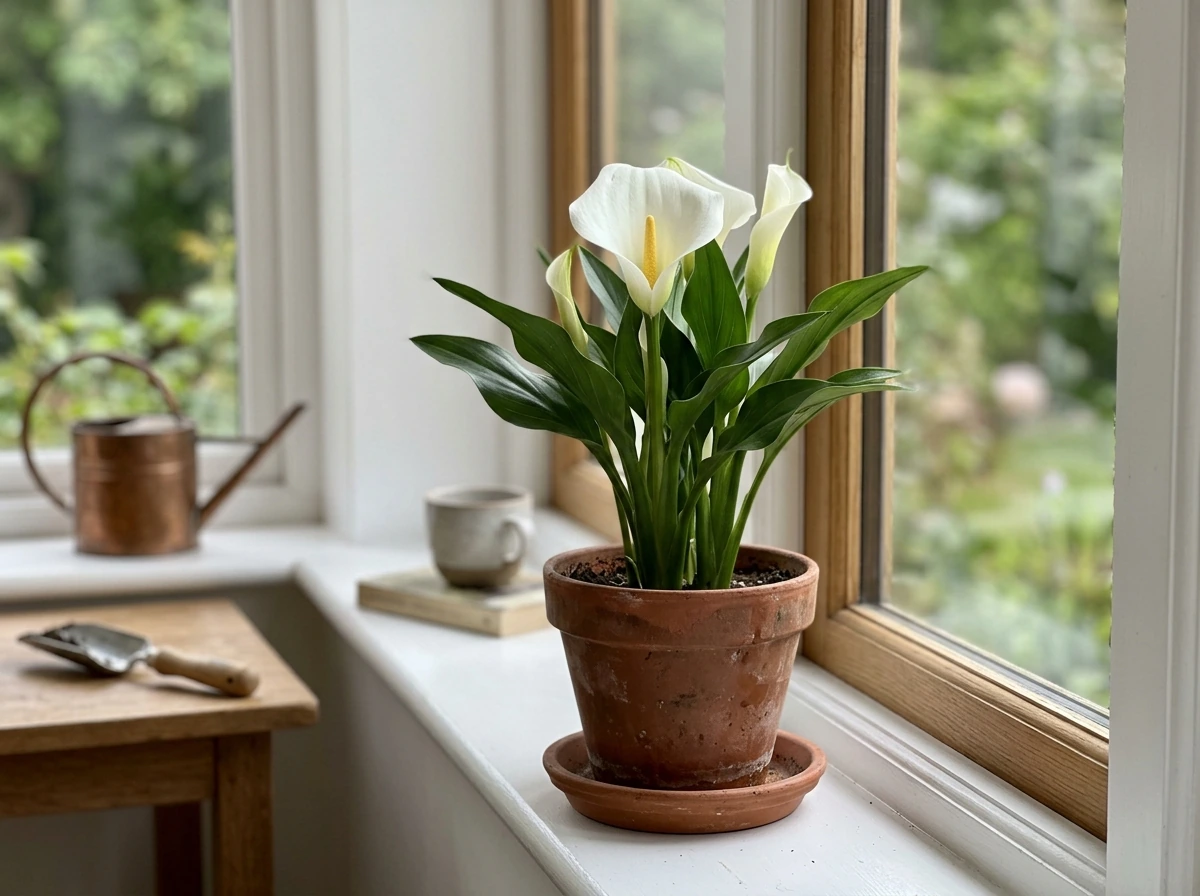
If you are curious about how this compares to growing a calla lily fully indoors in a pot, growing a calla lily inside covers the soil-based indoor approach in detail, which gives you a useful baseline for comparison.
Water depth, temperature, and keeping oxygen in the mix
Depth matters more than people expect. For a vase or hydroponic container, you want just enough water for the roots to reach and drink from, not a deep reservoir. Aim for 2 to 4 inches of water below the corm's base. The roots will grow down to meet it. Going deeper does not help and actually reduces oxygen availability in the lower water column, which is where root rot starts.
Temperature is another overlooked variable. Calla lilies prefer water that is roughly room temperature, somewhere between 60 and 75 degrees Fahrenheit (15 to 24 degrees Celsius). Cold water, especially below 55 F, slows root development significantly and can shock the corm. Very warm water (above 80 F) accelerates bacterial growth. If your home runs warm in summer, keep the container away from sunny windowsills where the water can heat up.
Oxygenation is the piece most people skip and then wonder why their plant rots. Still, stagnant water loses dissolved oxygen quickly, and calla roots need that oxygen just like they would in well-draining soil. The simplest fix is regular water changes every 7 to 10 days. If you want to go a step further, a small aquarium air stone and pump can keep the water gently aerated, which makes a noticeable difference in long-term root health and helps prevent algae buildup. Even just tilting the container slightly to swirl the water when you check on it once or twice a week helps more than you would think.
Light and placement for water-grown calla lilies
Calla lilies need real light to thrive, and water growing does not change that requirement one bit. Indoors, place your water-grown calla in the brightest spot you have: a south- or east-facing window that gets at least 4 to 6 hours of bright, indirect light per day is the target. Direct afternoon sun through glass can scorch the leaves, but gentle morning sun is fine. If your home is genuinely low-light, a full-spectrum grow light positioned 6 to 12 inches above the plant for 10 to 12 hours a day will do the job.
One thing to watch: direct strong sunlight also heats up glass containers fast, which warms the water and feeds algae. If you are using a clear glass vase and notice green slime building up, move the container slightly back from the window or wrap the lower half of the vase with something opaque (dark fabric or paper works fine). Algae itself does not directly harm the plant, but it competes for oxygen in the water and makes the whole setup unpleasant to maintain.
Outdoors, a covered patio or a spot with morning sun and afternoon shade is close to ideal during warm months. Avoid full midday sun if the container's water can heat up dramatically. The same logic applies as it would for growing calla lilies outside in a pot: bright but not brutally hot.
Troubleshooting: rot, yellowing, pests, and stalling
Mushy corm or roots (rot)
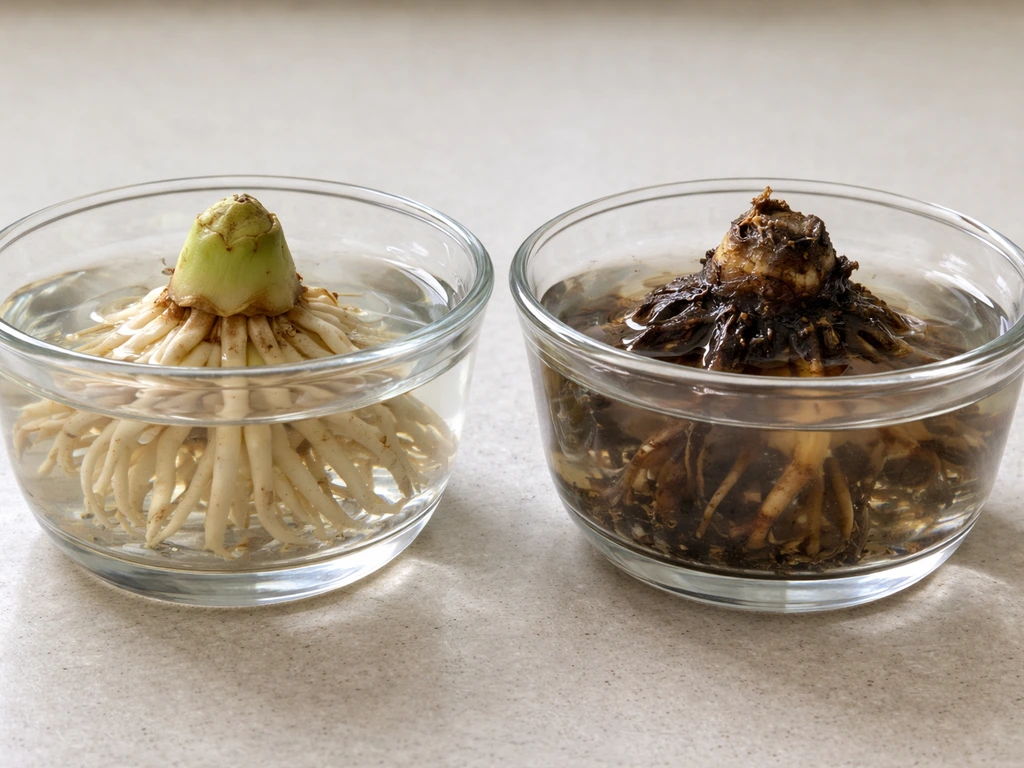
This is the most common failure and it almost always comes from one of three things: the corm crown is submerged, the water is not being changed often enough, or you used a fertilizer with too much nitrogen. Commercial calla production guides (Flamingo Holland's cultivation resources) specifically flag high nitrogen as a risk factor for bacterial soft rot, including Erwinia, which turns corm tissue into a slimy, foul-smelling mess fast. If you catch it early, remove the corm, cut away the affected tissue with a clean knife, let the cut surface dry for a day, then reintroduce it with fresh water and pebbles. If the whole corm is soft and smells bad, it is gone.
Yellowing leaves
Yellow leaves in a water-grown calla usually point to one of three things: too little light, nutrient deficiency (especially iron or magnesium, which flush out with water changes), or overwatering of the crown. If the lower leaves are turning yellow and the plant looks generally tired, add a diluted balanced fertilizer with micronutrients. If the yellowing is coming with mushy stems, it is the rot situation above.
No flowers
Callas grown in water often produce great leaves but refuse to bloom, and the two most common reasons are insufficient light and a corm that has not gone through a proper dormancy period. Callas need a rest, usually 8 to 12 weeks of cooler, drier conditions, to reset their flowering cycle. If your water-grown calla leafs out beautifully but never blooms, it likely skipped dormancy. Transition it to soil, let it dry down in fall, and give it a proper rest before starting again.
Algae and odor
Green water or a swampy smell means two things: too much light hitting the water and/or changes are not happening often enough. Increase your water change frequency to every 5 to 7 days, block light from the container itself (not the plant), and rinse the pebbles when you do a change. A small piece of activated charcoal dropped into the water can help with odor between changes.
Pests
Aphids and spider mites can still find a water-grown calla, especially indoors. Check the undersides of leaves weekly. A firm spray of water to knock them off, followed by an insecticidal soap spray if needed, handles most infestations. Fungus gnats, which are usually a soil problem, are less of an issue in a pure water setup, which is actually one small perk of this growing method.
Water growing vs. soil: which one actually makes sense for you
Growing calla lilies in water is genuinely cool and works well as a display method, especially for a single corm in a decorative container indoors. But it is not always the best long-term approach, and being honest about that matters. Here is a quick comparison:
| Factor | Water Growing | Soil Growing |
|---|
| Best for | Display, short-term indoor use, observation | Long-term growth, blooming, outdoor planting |
| Bloom reliability | Lower (needs dormancy to rebloom) | Higher with proper dormancy cycle |
| Maintenance | Frequent water changes needed | Regular watering, less monitoring |
| Rot risk | Higher without careful setup | Lower in well-draining mix |
| Flexibility | Easy to move, no mess | Harder to relocate once established |
| Longevity | Better as a seasonal or temporary setup | Can last many seasons with proper care |
If you are growing for long-term success and flowering, soil is the more forgiving and reliable medium. Calla lilies are not especially hard to grow in well-draining soil with the right light and moisture, and they cycle through dormancy much more naturally in a pot or garden bed.
When and how to move a water-grown calla to soil or outdoors
If you started a calla in water and want to transition it to soil, spring is the best time to make the move, once nighttime temperatures are reliably above 50 F (10 C). The transition is straightforward: remove the corm from the water setup, let the roots air out for an hour or two (do not let them dry completely), then plant into a well-draining potting mix with the crown just barely at or slightly above soil level. Water it in gently and place it in a bright spot. The plant may sulk for a week or two while it adjusts, but it will adapt.
For outdoor planting, calla lilies can grow outside in USDA zones 8 through 10 as perennials. In cooler zones, plant them after the last frost and plan to dig them up in fall. If you are weighing whether to keep your calla as a water display plant or move it to a garden bed, think about your climate first. In a warm zone, an outdoor bed gives the plant the best chance to multiply and bloom year after year. In a colder climate, you will be managing the corm through winter regardless, so a water setup as a seasonal indoor display is a perfectly sensible choice.
If you are still figuring out exactly where to grow calla lilies based on your specific space and climate, that is a great next step before committing to a permanent setup. And if you are leaning toward outdoor pot culture, growing calla lilies outside in a container is a middle-ground option that gives you portability with better long-term bloom performance than pure water culture.
The bottom line: water growing is a real, workable option for calla lilies, not a gimmick. Keep the corm crown above the waterline, change the water regularly, give the plant strong light, and you will get a leafy, healthy plant. Push it further into soil for reliable blooms and multi-season performance. Both approaches have their place, and now you know how to make either one work.